We don’t have a new house, in fact it was built in 1929. But since we moved in we’ve done a number of things to improve it’s energy efficiency. We installed aircrete insulation in the walls, upgraded the furnace and other major appliances and replaced all of the standard incandecent bulbs with CFLs.
The one thing I’ve wanted to do for some time is to replace the MR16 and GU10 halogen bulbs in the living room and dining room with LED bulbs. These kinds of bulbs have begun to show up at hardware and big box stores and I’ve been trying the ones I’ve found but with little joy.
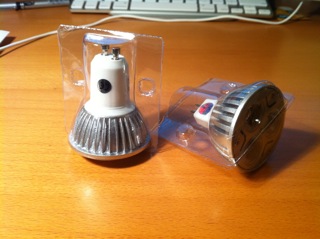
I’m not alone in my quest it seems, and I read Bill Bumgarner’s blog post about his experience with LED bulbs he purchased from Ledsion Lighting Technology Co. by way of AliExpress with interest. The 9W GU10 bulb specifications looked very promising so I order a lot of 10 of those and another lot of 10 of these 6W MR16 bulbs.
The GU10 bulbs are replacing 4 50W halogens on a standard track in our dining room, the MR16 bulbs are replacing 8 20W halogens on the IKEA Norrsken suspended wire system. These supply the only artificial light in both rooms and as a point of reference, my wife and I both like our rooms to be bright, especially in the winter, so matching the existing light levels would be a key metric in determining if this experiment was a success.
Ordering from Alibaba.com/AliExpress was painless. I placed the order for 20 bulbs on January 2nd, they shipped 4 days later, and I received them this morning (January 10th). Each bulb was individually packed and they all functioned perfectly out of the box.
Living Room
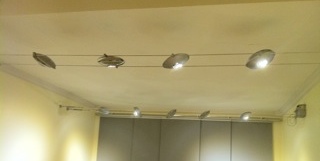
As I mentioned, I purchased 6W LED MR16 bulbs to replace the 20W halogens in the IKEA fixtures. I’d already experimented with LED MR16s in these fixtures (having purchased a 3W and 4W bulb from another supplier), but I have to say I was very pleased with the performance of the 6W bulbs. They were easily as bright as the 20W halogens, though because there beam angle is somewhat narrower I ended up adding two more fixtures to the track making a total of 10 bulbs.
For those keeping track at home, that is:
| Old | New | |
|---|---|---|
| Living Room | 160 Watts | 60 Watts |
| Savings: | 100 Watts |
Dining Room
I was a little concerned about achieving the desired light level in the dining room. It has only one small window (which is shadowed by the neighbouring house) and is the hub around which breakfast newspaper reading, homework completion, and business meetings all occur.
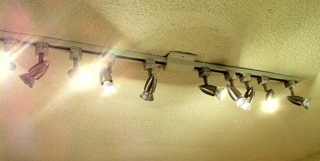
Again, I’d experimented with other LED bulbs trying to match the light level from the existing halogen bulbs without much success. And initially I thought that this was going to be another disappointment. Replacing the 4 x 50 W halogen bulbs with with 4 x 9 W LEDs produced nowhere near the same light level. Also the narrower beam from the LED resulted in very noticeable dark areas and pronounced shadows.
Luckily the lower power consumption of the LED bulbs meant that I had excess capacity on the track, so I started adding additional bulbs and fixtures and played with their placement and aim. Eventually I was able to achieve a decent level of light and coverage. However it took all 10 of the 9 W LED bulbs to do so.
Our current score sits at:
| Old | New | |
|---|---|---|
| Living Room | 160 Watts | 60 Watts |
| Dining Room | 200 Watts | 90 Watts |
| Totals | 360 Watts | 150 Watts |
| Savings: | 210 Watts |
Additional Notes
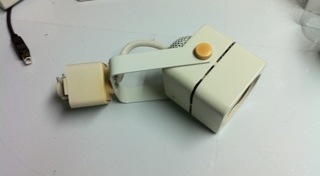
LED bulbs are generally larger than a standard halogen. So (though you cannot see it from the photos) the MR16 bulbs extend beyond the edge of the IKEA fixtures, and I needed to replace the existing track fixtures in the dining room (see photo below) with ones that didn’t enclose the bulb.
Summary
So, I’d say that this experiment was a qualified success. The LED bulbs were more expensive than the halogens they replace, doubly so because I needed to use more of them. But I was able to achieve the overall light level we wanted, and our power consumption dropped considerably. I’m also hoping that the dinning room GU10s won’t burn out anytime a cool breeze wafts by either (a problem we had with the halogens) but time will tell on that one.
Overall I’m pleased.